I’ve been learning to use our 3D printer. Ben has been the primary printer, but I wanted to be able to use it for my own projects. He’s graciously led me through the process several times. I don’t understand every aspect of printing – it has many parameters you can customize and many MANY things can go wrong. But I feel like I have a grasp of the basics. The first thing I practiced was a Wonder Woman tiara.
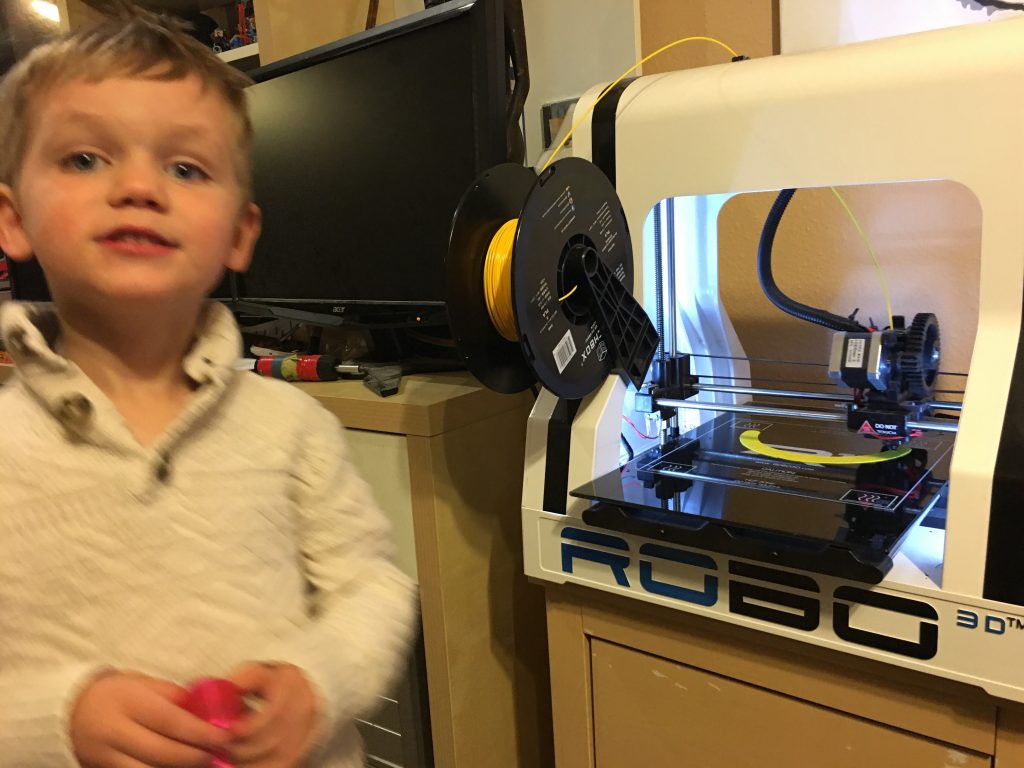
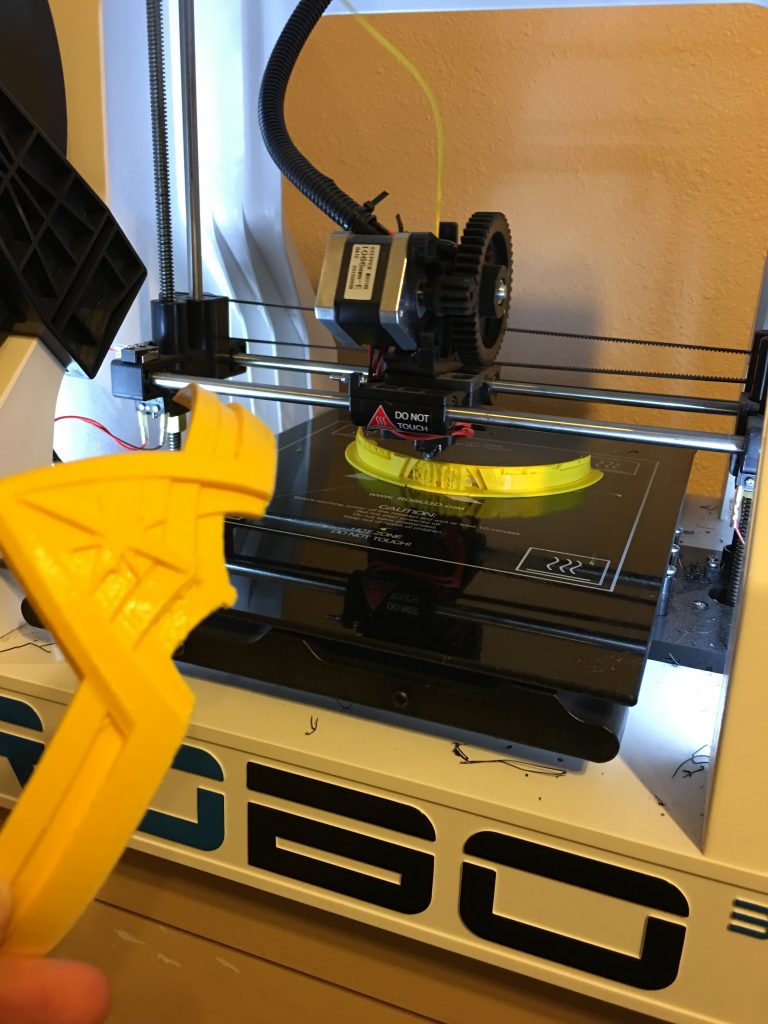
It was a basic, medium sized print using PLA in yellow. I had some trouble with it splitting at the base, and played around with rafts a little. I also tried various amounts of support material, until I found one I liked.
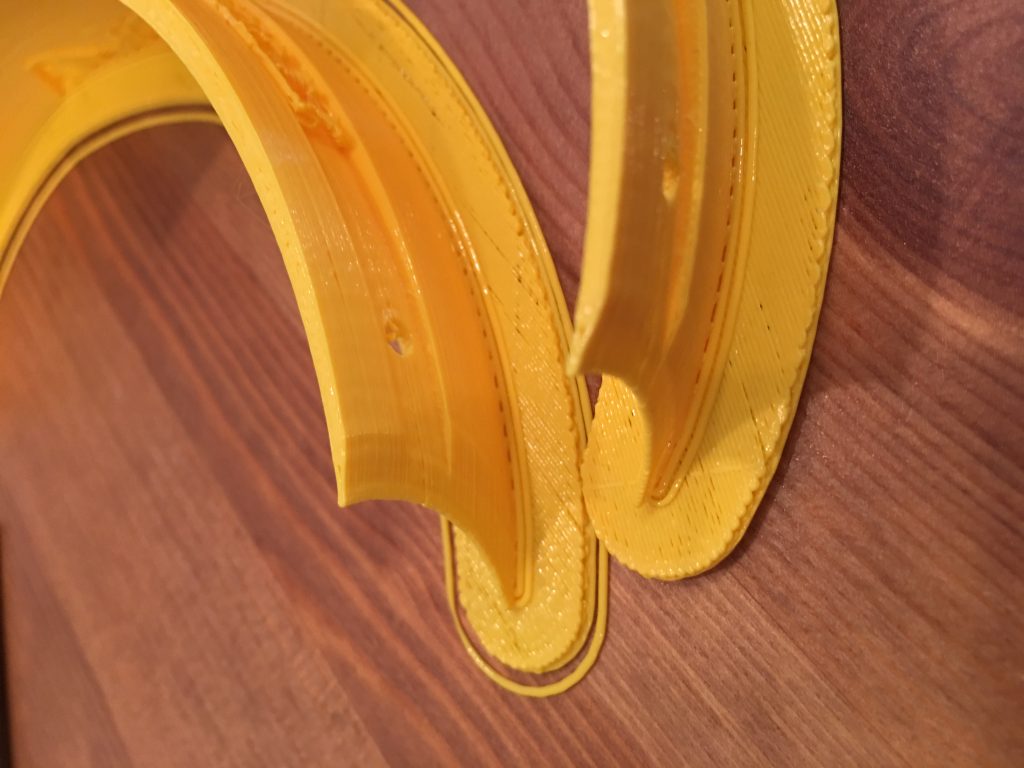
I ended up making three of them. One for Amanda and one for me, plus one for Ben’s boss to finish and give his wife.
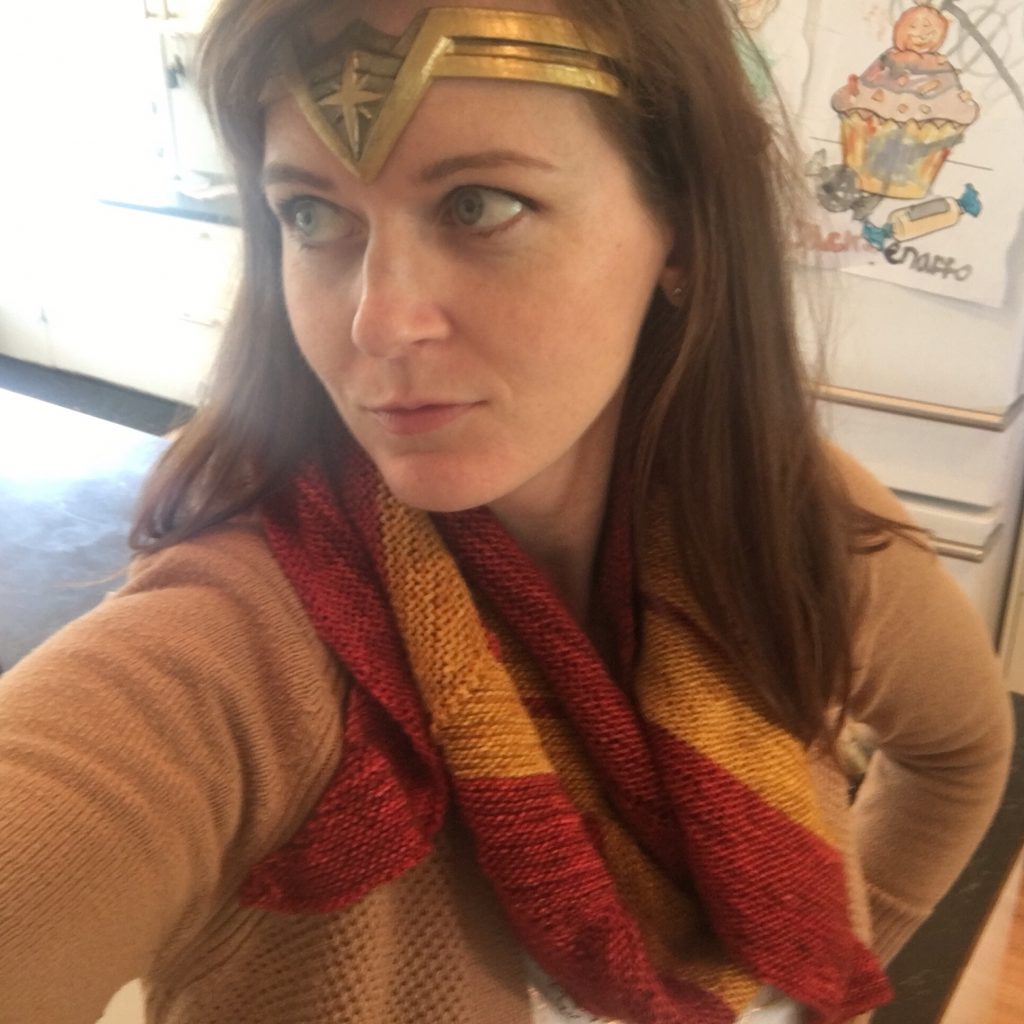
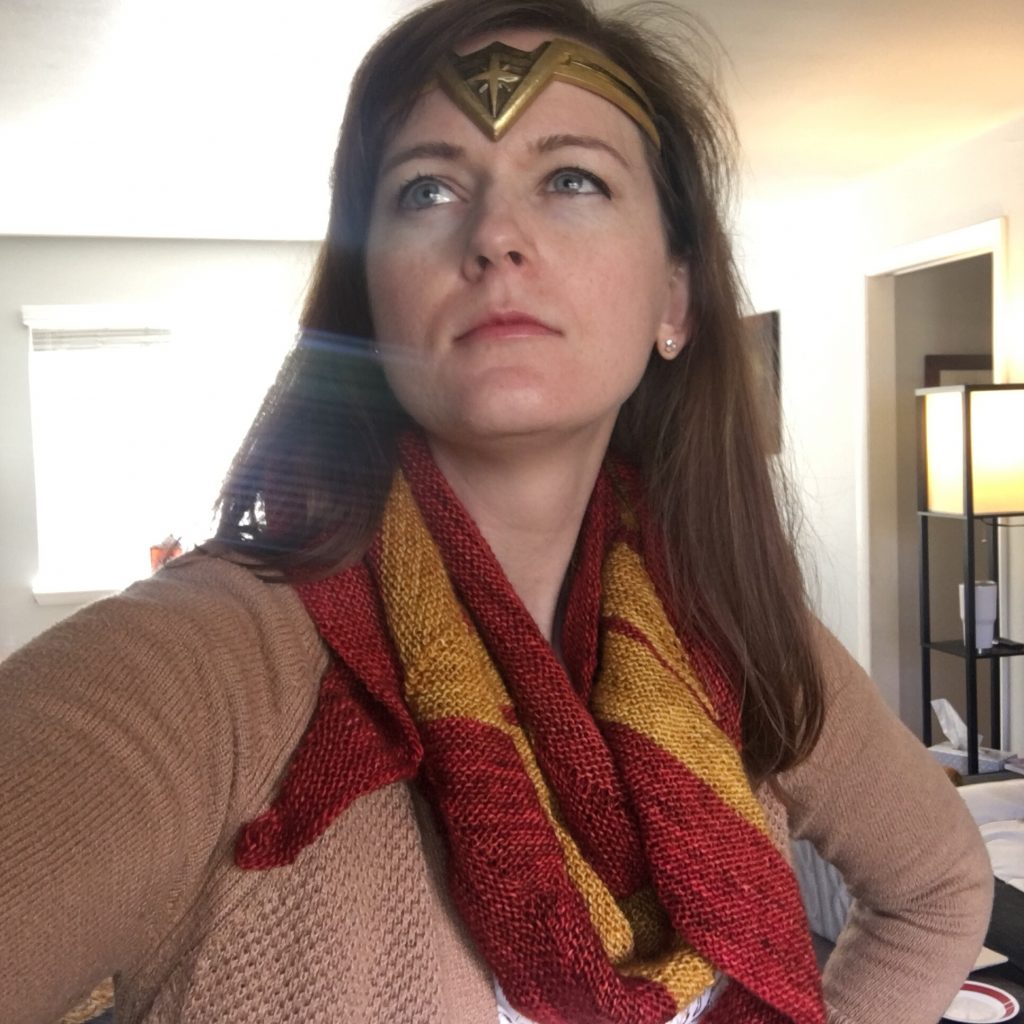
Here is the finished tiara after sanding, priming with leveling goo, and painting. The tiaras go perfectly with the Wonder Woman shawl (the two together were a gift to Amanda, and I made myself a set too!).
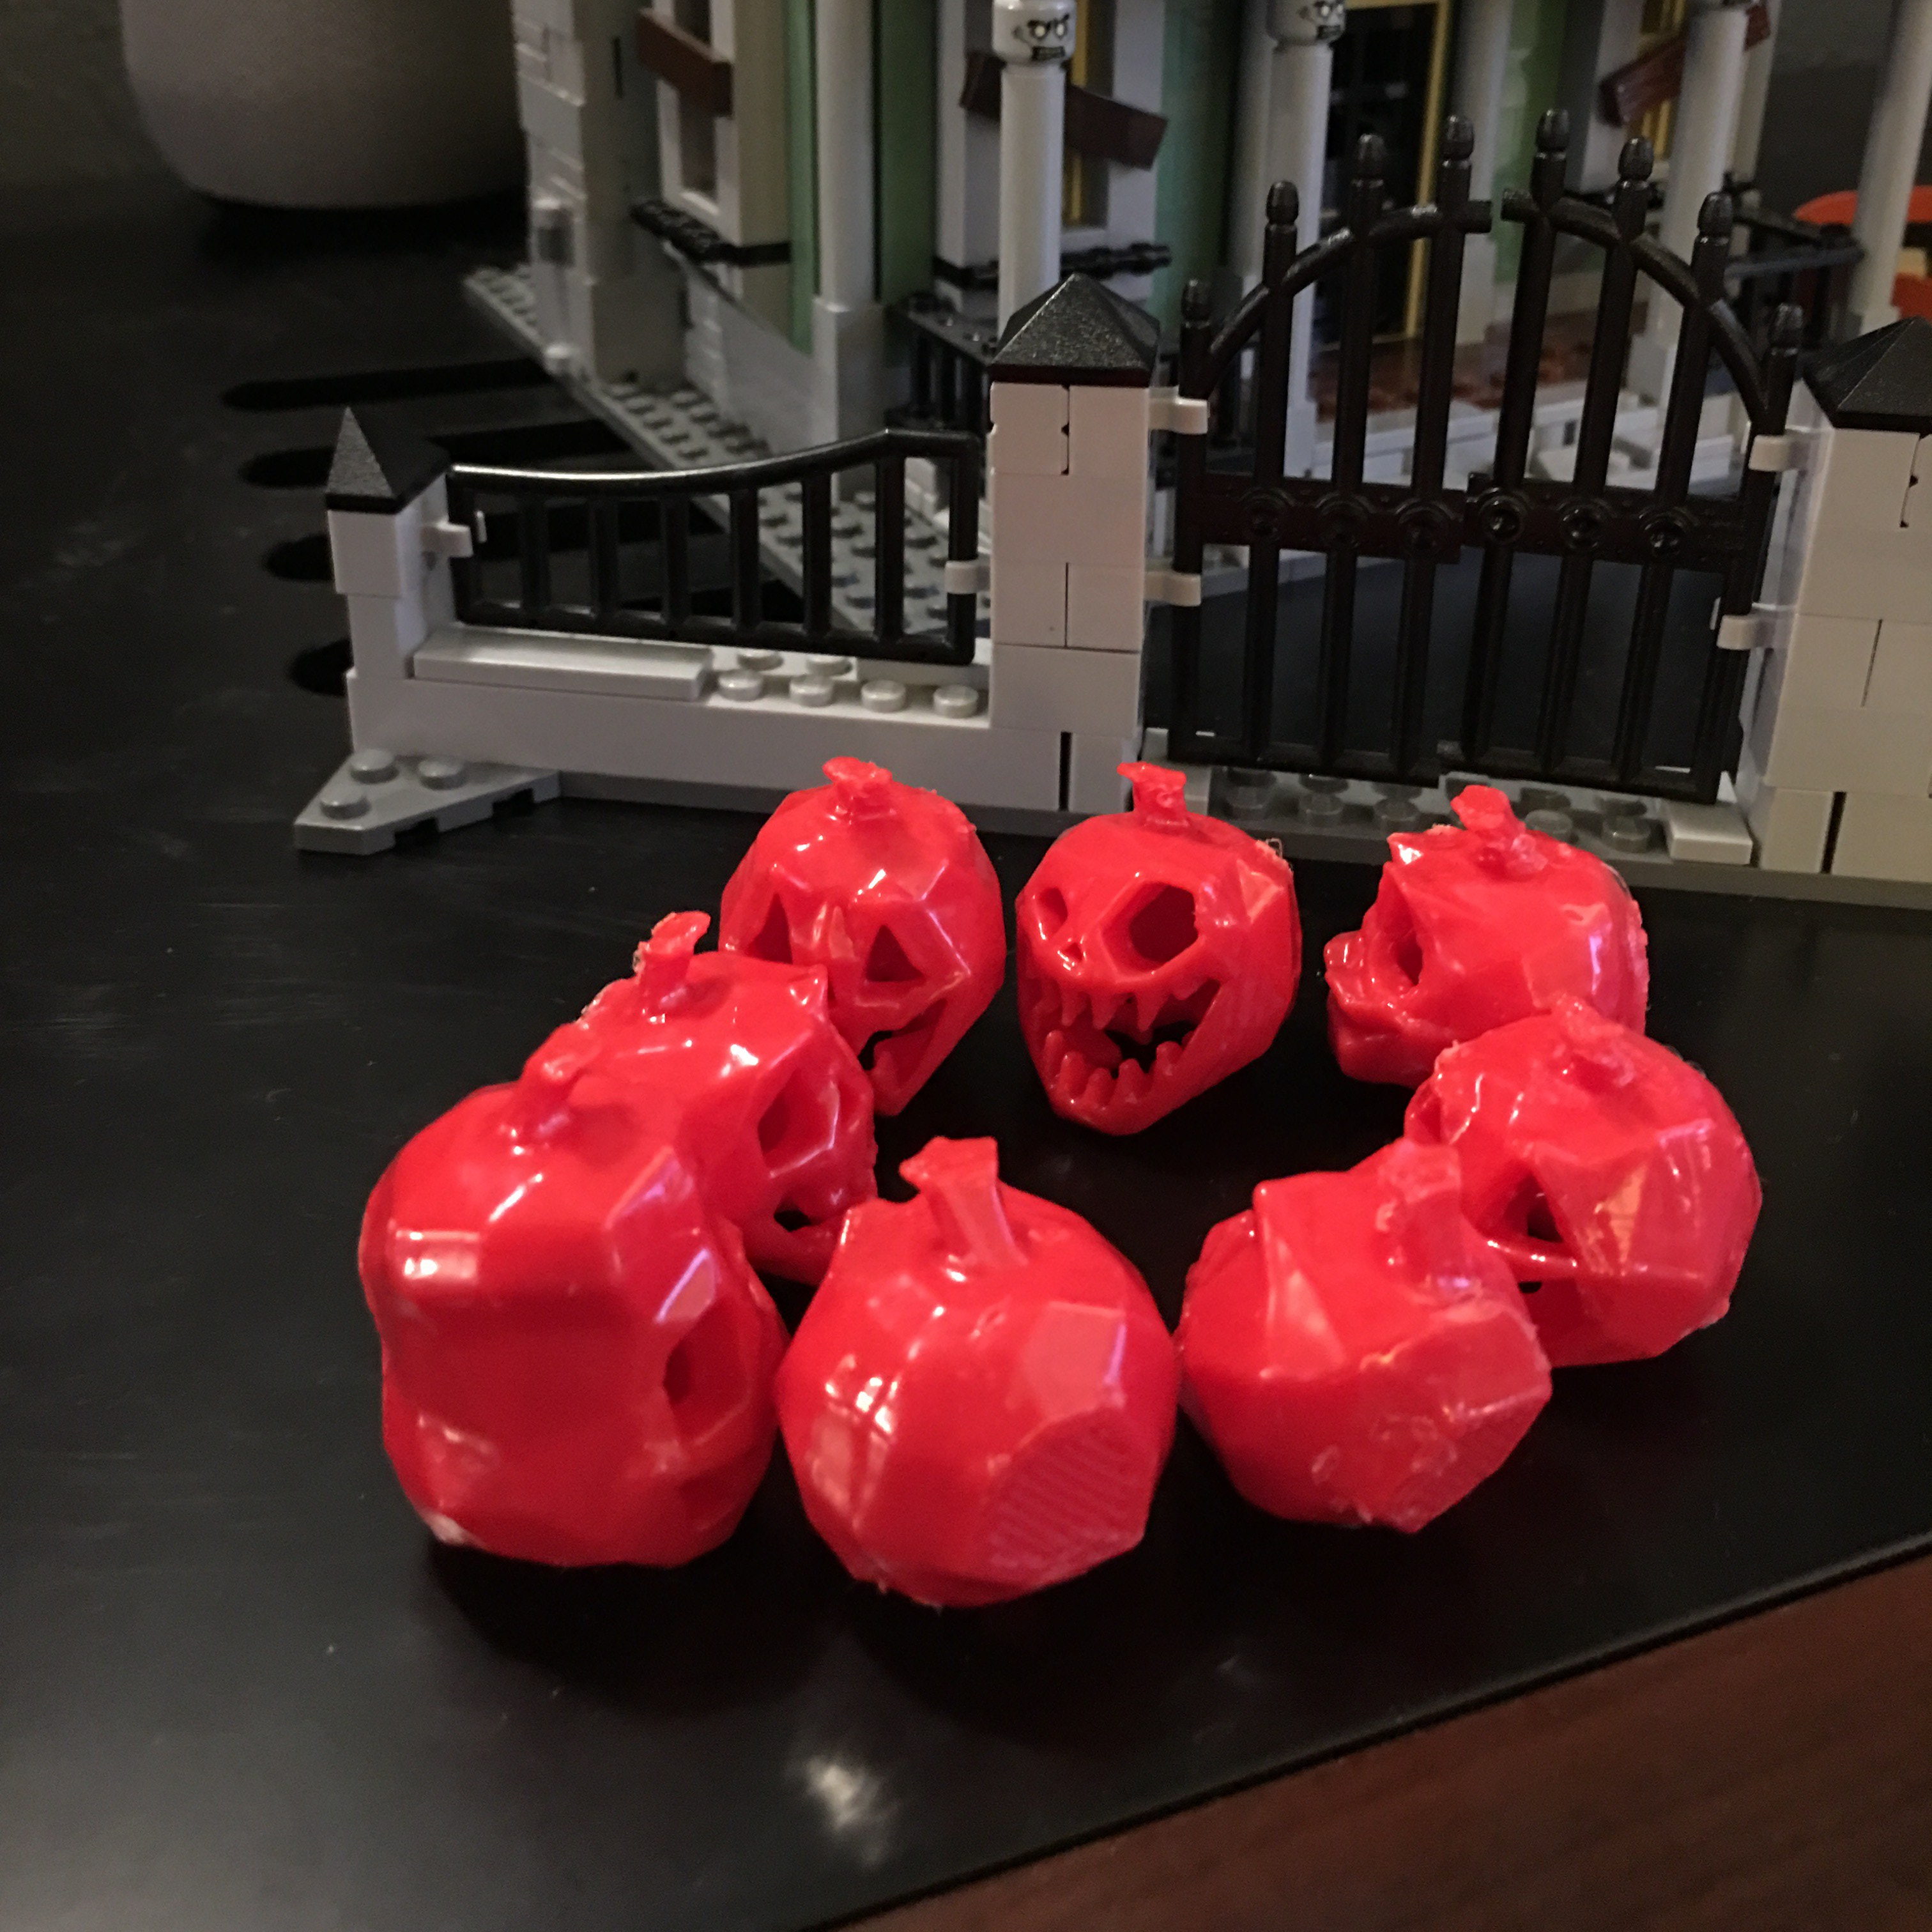
Next I tried working with ABS. True to Ben’s warning, this stuff stinks. Literally. Very strong chemical vapors while it printed. It also is more prone to warping and layers not sticking properly. I printed a set of Halloween pumpkins to practice.
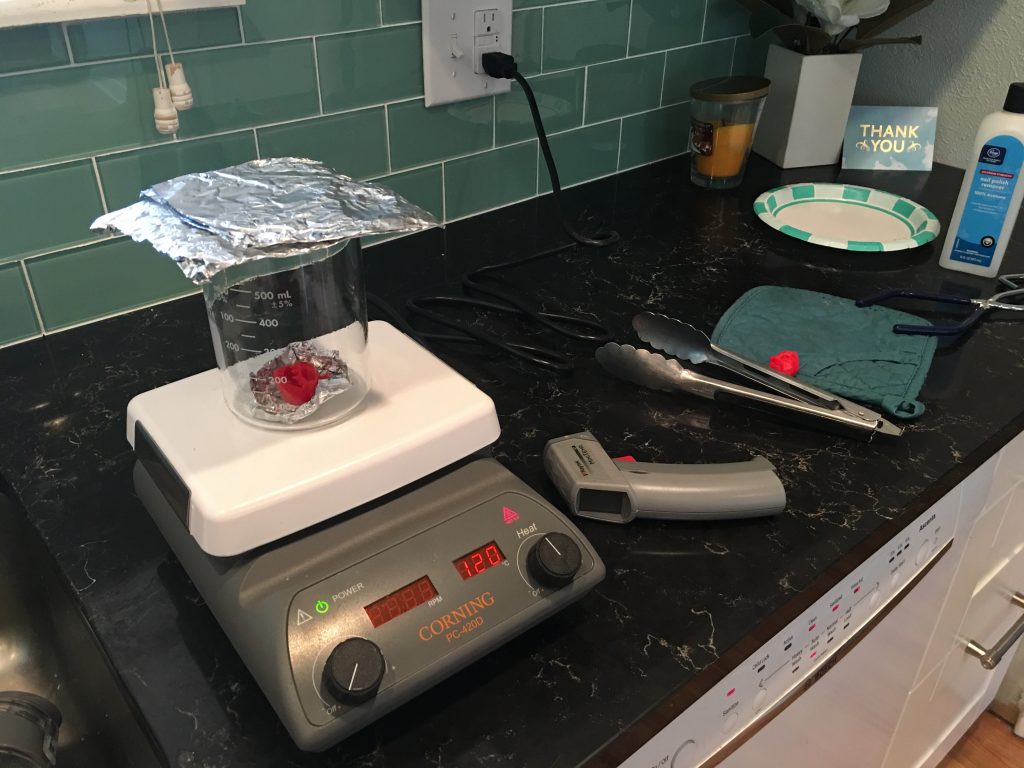
The other interesting property of ABS is you can smooth the ridges between each layer by immersing it in acetone vapors. I took advantage of the chemistry set on loan from my mom for our Mad Scientist halloween get-up. I gently heated pure acetone in a beaker to create thick vapor, floating the pumpkins on a foil sheet and covered loosely with foil. If the acetone touches the ABS it will get tacky, chalky, and lose definition. Here’s a picture of the set up, btw my fire extinguisher is on the other side of the counter. I was very nervous about this process.
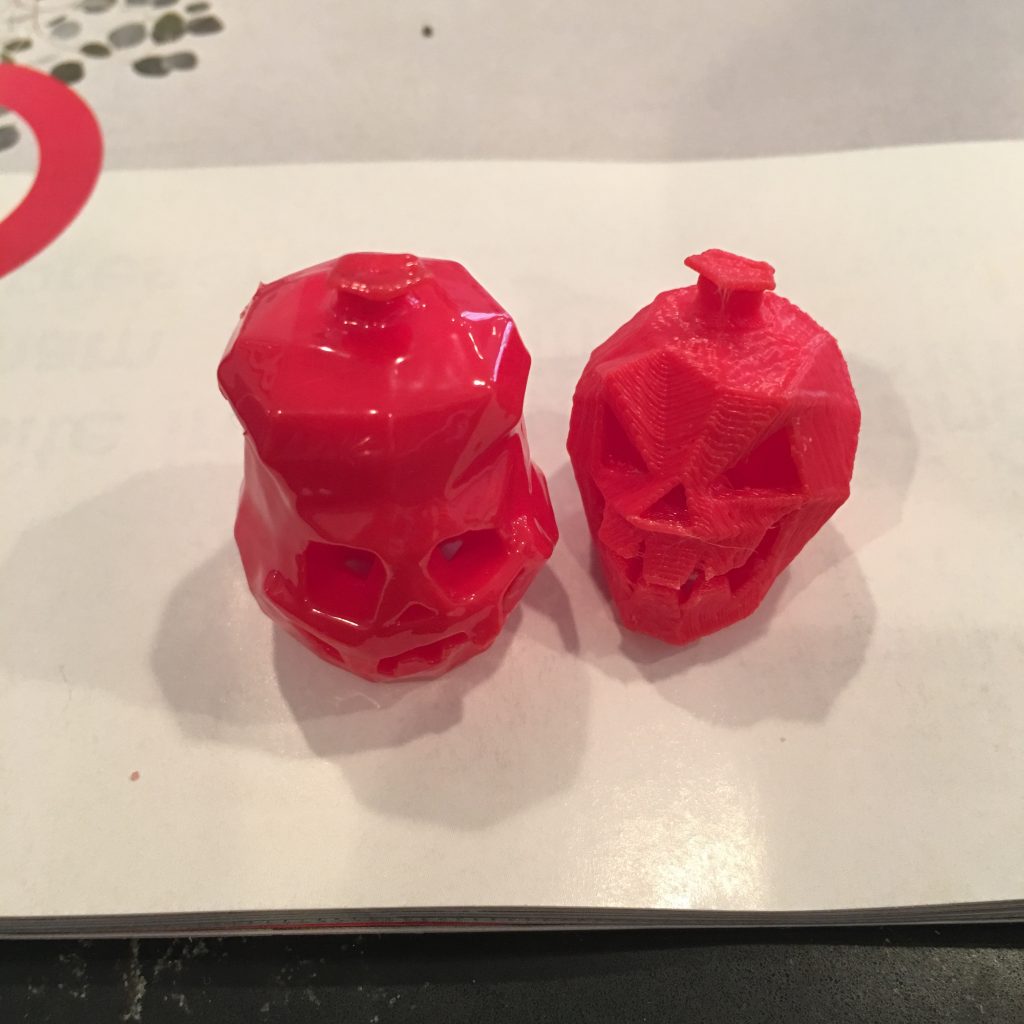
Here’s a side-by-side of two pumpkins, the shiny one on the left had the acetone bath, the rough one on the right is straight off the printer.
3D printing is fun and addicting, but it’s good to recognize its limits. I really wanted a brain for our Mad Scientist Lab. I scoured thingiverse for a brain file I could manage. They were all dense – using nearly a whole roll of filament, not to mention would be riddled with supports and need a lot of finished. After a week of hemming and hawing I had an epiphany.
Clay.
Use cheap, old-fashioned clay I already happened to have in my craft storage. Duh.

Behold: Old-Timey 3D Printing.
During December I kept busy with knitting full-time. In the week between Christmas and Ben’s birthday I continued the frenzy, knitting him a fair-isle hat. (I still intend to post a knitting round-up soon). After the hat, I saw on reddit someone had made a dice tower out of wood. I had never heard of such a thing. A dice tower would be perfect for Ben! He loves gaming and we are teaching the boys to play. Not only would this curb Jack’s attempts to control his dice rolls, but it would prevent both his and Sam’s tendency to let die scatter onto the floor.
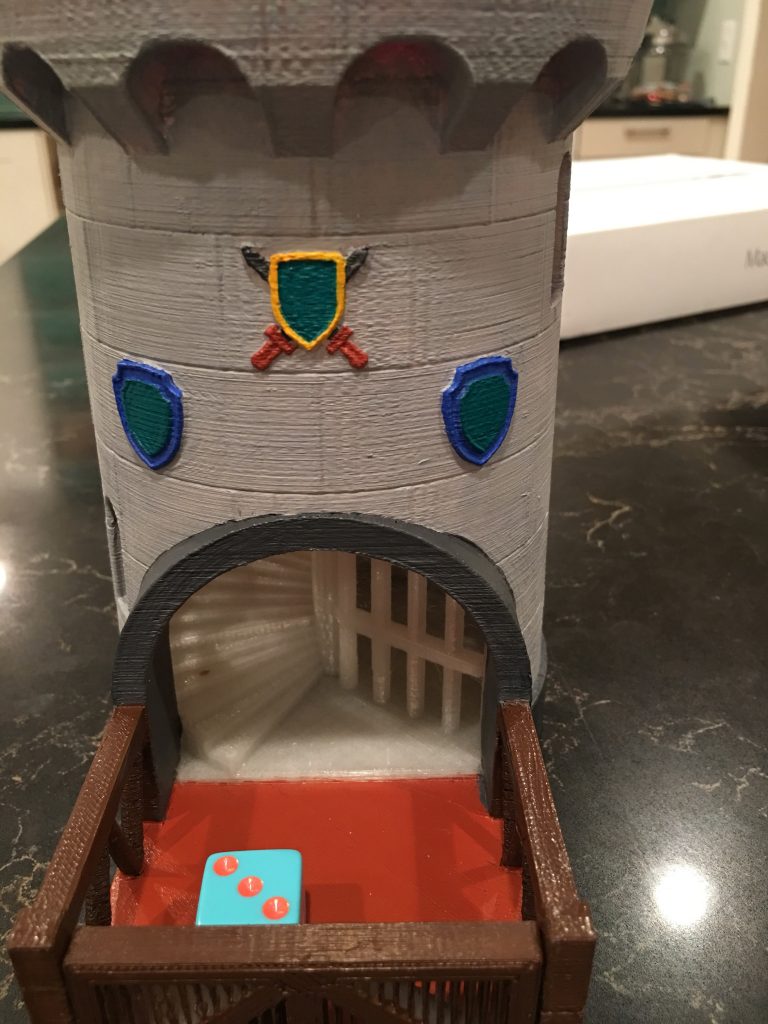
I wondered if I could 3D print that. A quick search on thingiverse yielded a plethora of files of various designs. I chose one that looked castle-like, was fairly tall, and had a cool gate. The gate prints flat in one piece with the tower, printing its own hinge that you can snap up afterward. This was the first time I printed an object completely by myself. I only checked in with Ben on the size parameters of our print space and the amount of filament it would take.
I didn’t take any pictures of the process, but in hindsight I should have. I printed the file with no supports, as suggested by others who had done it. It was an 18 hour print job. I hadn’t printed anything in a few months. Despite all those potential issues, it printed BEAUTIFULLY! Voila!
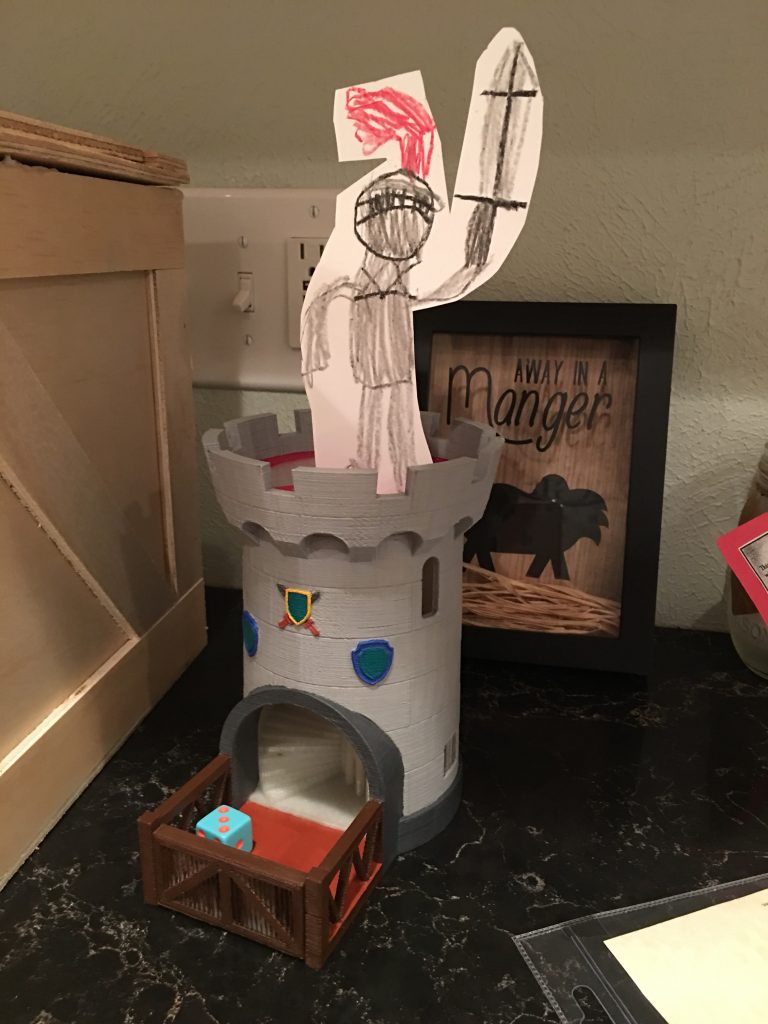
(Jack insisted the castle needed a knight.)
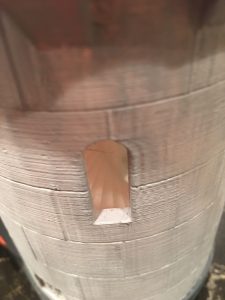
It’s pretty cool, right? I used glow-in-the-dark filament because that was the largest spool of PLA I had lying around. I decided to paint it without sanding or ridge filler. The randomizer is a spiral staircase that runs down the whole tower. You can see it through the arrowslits.
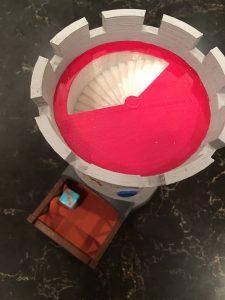
Here’s a close-up where you can see the stairs meet prison bars to the dungeon. There’s a little burn spot on the stairs you can see. I decided painting the interior would be a huge pain, so that will remain glow-in-the-dark. Needless to say, the boys (including Ben) all think this is SUPER cool.
Leave a Reply